| |トップページ|それぞれのF1/F3|メンバーズリスト|データベース|リンク |
DUCATI F1/F3 DATA
年式ごとのスペックや整備,トラブルデータ等々... みんなで作っていきましょ。
最終更新 2002/7/28
DUCATI 750F1
DUCATI 400F3/350F3
.
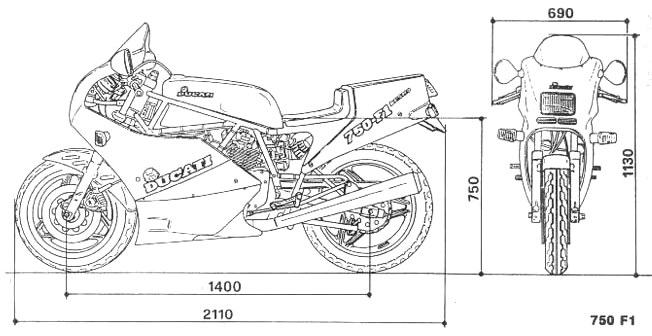
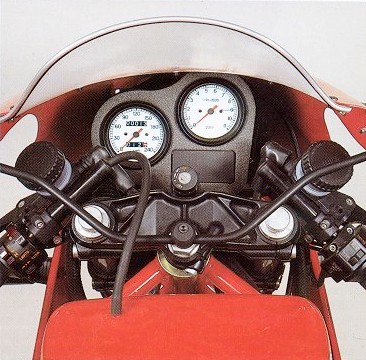
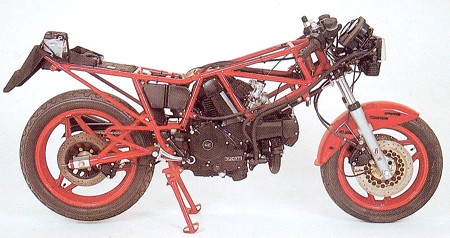

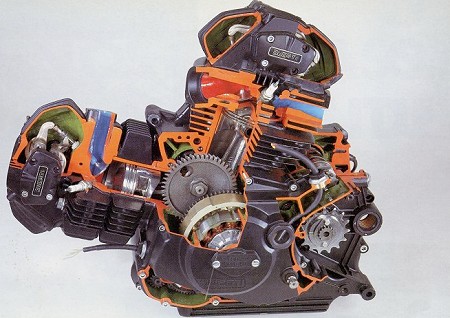
Ducati 750 F1 - 750 Montjuich - workshop
manual
| F1-I | F1-III | F1-Mj | F3 | TT2 | 900SS 91-93 |
900SS 94-96 | 600 -750SS |
V2-F1 S/R |
V2-SS Racing | V2-SS Daytona | V2-SS Street | SS900 00 |
996 | |
| IN/BTDC | 29 | 39 | 67 | 40 | 90 | 20 | 43 | 12/31 | 31 | 32 | 20 | 25 | 25 | 11 |
| IN/ABDC | 90 | 80 | 99 | 80 | 92 | 60 | 85 | 70/88 | 56 | 66 | 65 | 55 | 75 | 70 |
| EX/BBDC | 70 | 80 | 93 | 57 | 100 | 58 | 82 | 56/72 | 45 | 66 | 61 | 45 | 66 | 62 |
| EX/ATDC | 48 | 38 | 70 | 43 | 64 | 20 | 46 | 25/46 | 11 | 29 | 27 | 5 | 28 | 18 |
| Lift in (mm) | 11.76 | 9.35 | 13.1 | 11.5 | 13.1 | 13.1 | 11.8 | 9.6 | ||||||
| Lift out (mm) | 10.56 | 8.5 | 11.5 | 11.3 | 11.4 | 11.5 | 11.4 | 8.74 |
|
|
750F1 up to no. 7501504 |
Montjuich and 750F1 from no. 7501505 |
|
Type electronic |
Ducati |
Ducati |
|
Make |
Bosch |
Kokusan |
|
Automatic advance |
5/33 degrees |
5/33 degrees |
| Spark plugs |
Champion LY82C |
Champion LY82C |
| Electrode gap |
0.6mm |
0.6mm |
| Bar | PSI | |
| Front | 2.3 | 34 |
| Rear | 2.6 | 38 |
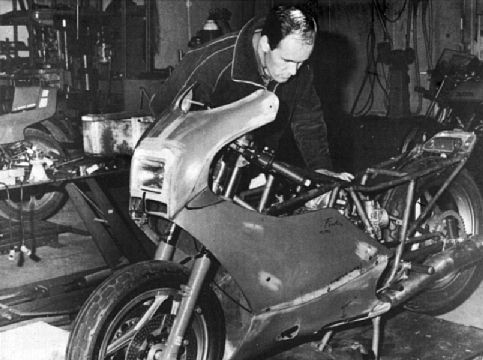
1984 - Ducati enlarges its Pantah-based TT2 race engines to 750cc to compete in that year's TT1 class.
1985 - A scant few months away from Ducati Mechanicca being taken over by the Cagiva Group, a street version of the TT1 race bike is released. They call it the "750 F1 replica" in the owner's manual.
The general market is a bit disappointed that the bike isn't really the race replica expected. So-so forks, asthmatic engine, rudimentary suspension, and some suspect styling contribute to that impression.
In late 1985 at the Milan Show the first 750F1 "special", the Montjuich, was announced. This was more like it - wild cams, big carbies, LOUD exhaust, fatter tyres, lightweight wheels, tweaked engine. Rare - 200 made - an instant classic.
1986 - In an unusual move for Ducati, the second version of the 750F1 is an improvement on the original. Whilst the 1986 model onwards lost the alloy tank and floating rear disc, it gained decent instruments, better forks, much bigger inlet valves, better oil filtration, and a stronger crankcase and gearbox. New decals with Cagiva elephant over new style Ducati lettering.
1987 - The second "special" is released - the Laguna Seca. Again, 200 made, but not quite the bike the Montjuich was. Heavier wheels, milder cams (some would say just as well...), same steel fuel tank as the standard 750F1
1988 - The last of the "specials" - the Santa Monica is released. A hybrid between the spec of the Montjuich and the Laguna Seca, it came as a dual seat bike with cowling. 200 made, but seemingly a bit harder to find. The first 851 model arrived in the same year and somewhat overshadowed the Santa Monica.

Depression type, dry-type inlet filter. The system consist of an automatic relief
cock and of a cock with manual control (and it sucks!! Commonly causes fuel
starvation to the rear cylinder - easily
fixed though.)
750F1 - Dellorto PHF36AD (front), PHF36AS (rear)
Montjuich - Dellorto PHM40ND (front), PHM40NS (rear)
So what does this all mean? Dellorto make a left and right hand caburettor - in Italian "D" stands for right, and "S" for left. Both these types of Dellortos can operate at up to 40 degrees off horizontal, so there is nothing "special" about the front or rear carbies (although the actual jetting between the two can differ!).
| 750F1 | Montjiuch | |
| Idle (Pilot) jet | 65 | 65 |
| Main jet | 135/140 | 148/155 |
| Needle | K8/2 | K5/2 |
| Needle Jet | 265 | 300 |
| Slide (aka Gas valve) | 60/3 | 60/1 |
| Float Distance | 17.5 to 18.5mm | 17.5 to 18.5mm |
| Accel Pump capacity* | 3.5 threads showing | n/k |
| Float weight | 10g | 10g |
| Spray nozzle | 265AB | 265AB |
| Pick up pump jet | 35 | 45 |
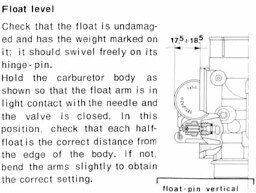
フロート調整
フロートが損傷を受けていないことを確認し,その上で重量をチェックしてください(10g)。
フロートがヒンジピン上で自由に回転する事も確認。金属製のフロートアームがニードルと軽く接触して
バルブを閉じるように、図に示すようにキャブレターを保持して下さい。この位置で
キャブレターボディの端からフロートまでの正確な距離を計測します(17.5~18.5mm)。
正確なセッティングを得るためにわずかにアームを曲げて調整して下さい。
Needle Chart
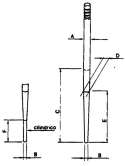
Click for larger version. Use 'back' button
or close window to return.
|
NEEDLE |
A Dim |
B Dim |
C Dim |
|
K1 |
2.45 |
1.75 |
37 |
|
K2 |
2.45 |
1.75 |
42 |
|
K3 |
2.50 |
1.50 |
39 |
|
K4 |
2.45 |
1.50 |
39 |
|
K5 |
2.45 |
1.50 |
37 |
|
K6 |
2.45 |
1.75 |
39 |
|
K7 |
2.45 |
1.25 |
39 |
|
K8 |
2.50 |
1.50 |
37 |
|
K9 |
2.45 |
1.50 |
42 |
| 0 - | K1 | K2 | K3 | K4 | K5 | K6 | K7 | K8 | |
| 10 - | 2.455 | 2.450 | 2.500 | 2.445 | 2.450 | 2.450 | 2.450 | 2.500 | |
| 20 - | 2.455 | 2.450 | 2.500 | 2.445 | 2.450 | 2.450 | 2.450 | 2.500 | |
| 30 - | 2.455 | 2.450 | 2.500 | 2.445 | 2.450 | 2.450 | 2.450 | 2.500 | |
| 30 - | 2.455 | 2.450 | 2.500 | 2.445 | 2.450 | 2.450 | 2.450 | 2.500 | |
| 40 - | 2.390 | 2.305 | 2.360 | 2.320 | 2.375 | 2.340 | 2.280 | 2.420 | |
| 50 - | 2.190 | 2.140 | 2.080 | 2.065 | 2.100 | 2.160 | 2.970 | 2.140 | |
| 60 - | 1.990 | 1.970 | 1.820 | 1.820 | 1.840 | 1.980 | 1.660 | 1.870 | |
| 70 - | 1.800 | 1.805 | 1.575 | 1.570 | 1.580 | 1.800 | 1.360 | 1.605 |
Main Jet
122/123/125/128
130/132/135/138
140/142/143/145/148
150/152/155/158
160/162/165/168
170/172/175/178
Pilot Jet
40-70 1step
It's reasonably easy in theory, but not so clear in practice - the two-into-one exhaust can make things difficult. Following the steps below with a warm engine should do the trick (insert disclaimer here...).
Step 1 - decide what you are adjusting - is the idle uneven, too fast, too slow, too rich?
Step 2 - get yourself a magic screwdriver.
Step 3 - the two diagrams below show the idle and mixture screws.
the idle screw is the big one with the exposed spring on the side of the side of the carbie
the mixture screw is the smaller recessed screw forward of the idle screw.
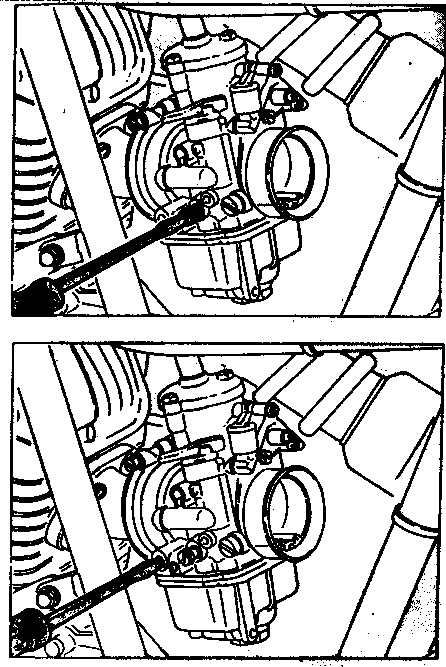
Top picture is idle, bottom is mixture
Step 4 - Get the idle speed going about where you want it - clockwise is faster, anti-clockwise is slower. Work on both carbies in turn, keeping adjustments equal.
Once you have the idle speed right, we work on getting the mixture right. Don't worry for the moment if the idle is uneven between cylinders.
Step 5 - Now for the mixture screw. Anti-clockwise = richer, clockwise = leaner. You have to listen to the exhaust and watch the tacho as well.
Turn the screw about a quarter turn in either direction, and check whether the revs rise or fall. Repeat in the opposite direction if the revs fall in the first direction.
You will find a point where the engine revs fastest. Turn the screw to make the mixture just a little richer (even 1/8 turn is fine).
Now go to the other carbie and repeat the process. You should notice the same "sweet spot" where the bike idles fastest, and again make the mixture just a fraction rich.
Listen to the exhaust - the tone of the beats should be similar: a normal and hollow beat alternating indicates one cylinder is too lean - enrich and back off the mix on one carbie them the other and see if the noise disappears. You should find out which one is the culprit pretty quickly
A "fluffy" beat (for want of a better term) indicates one or both cylinders running too rich. Lean and enrich the carbies until you get a strong sounding beat.
Step 6 - by now you've got the mixture sorted and have probably discovered the bike is idling faster than you want. First, listen to the exhaust beat - is it even? Ideally you want to lower the idle speed on the carbie that is too fast, so that the beat become even. If the beat is already even, you have to back off the idle screws on both carbies in small equal increments. Don't get suicidal if it's hard to pick whether they're even or not - as long as the bike idles at the right speed and sounds okay.
Apparently the purists sneer at vacuum gauges, but it doesn't mean you have to live in unsynchronised purgatory. There's lots of ways to sync, but here's a way that I find really easy and accurate (providing they're in sync at idle to being with!)
Take off the air filters
Stand on the right side of the bike
With your left hand reach across the seat and put your middle finder lightly against the base of the slide in the rear carbie
Look at the front carbie - you can see the slide.
Now gently twist the throttle - your finger feels the rear carbie's slide move, and your eyes see the front slide move.
You'll tell pretty readily that one is moving before the other. Working on the adjustment nut of the front carbie as shown in the diagram below, screw in or unscrew the nut until you can tell the slides are getting closer to moving in unison.
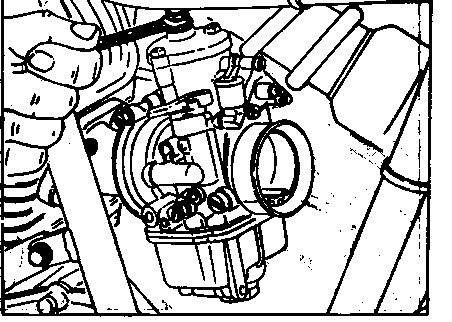
This picture is of the rear carbie, by the way...
You'll be amazed by how accurately you can sync the slides in this fashion.
Check the seating of the cables at both the throttle and the tops of the carbies to ensure you haven't got a snag or an unhoused end - this will affect the result.
You may discover that the carbies feel like they go out of sync once the engine heats up (rough revving, apparent drop in power). Don't despair - repeat the exercise again. If the sync is still fine, it may be your jetting that requires attention.
Replace your air filters and go for a blat.
![]()
|
Copyright(C) 2000- 2002 -DUCATI F1 club
japan- All Rights Reserved.
|